


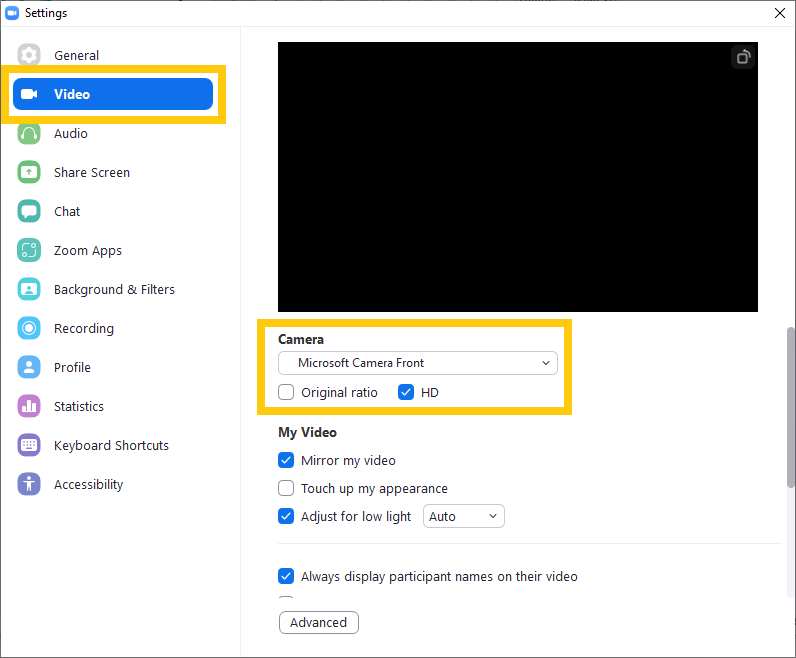
Camera:
Select the camera you want Zoom to use.
Select “HD”.
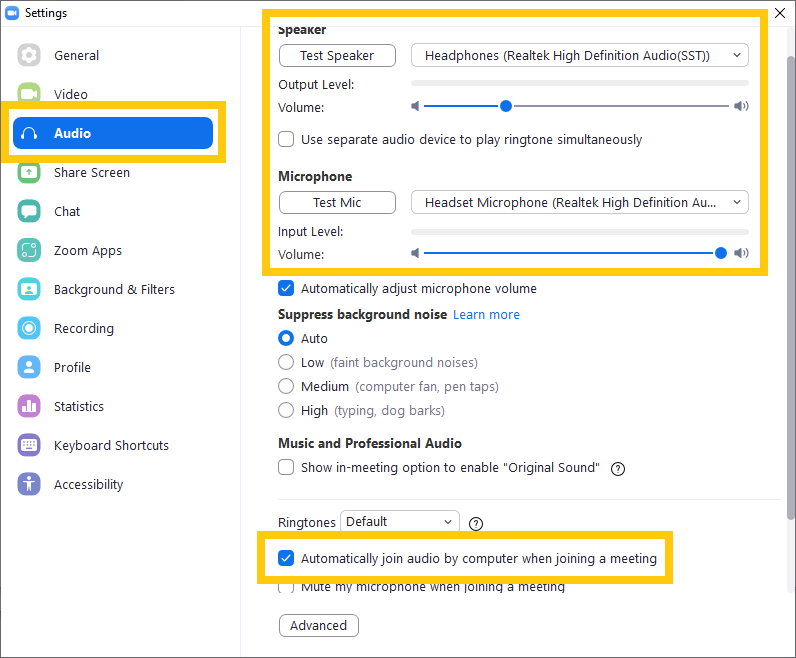
Audio:
Set your microphone and speaker (those associated with your headset), test them, and adjust their volume.
Select “Automatically join audio by computer when joining a meeting”.
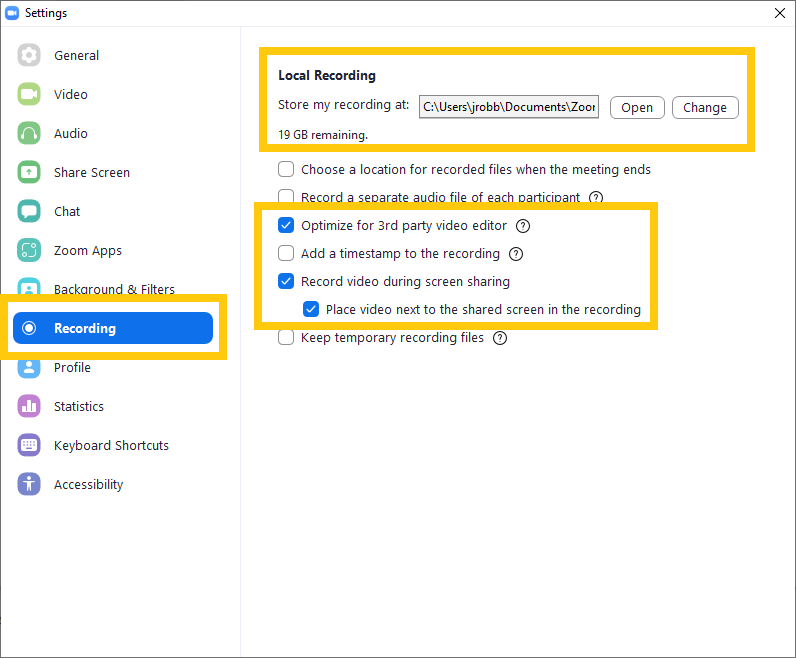
Recording:
Verify the location for where your video will be saved and change it if necessary.
Select “Optimize for 3rd party video editor”.
Select “Record video during screen sharing”.
Select “Place video next to the shared screen in the recording”.